How to Set Up a Custom Webhook
Receive article data as structured JSON payloads at any endpoint — perfect for custom CMS integrations, static site generators, or any platform.
Before You Start
- 1A BlogAmplify account (free to create)
- 2A publicly accessible server with a POST endpoint
- 3Basic understanding of HTTP webhooks and JSON
Step-by-Step Guide
Set up an endpoint on your server
Create a POST endpoint on your server that will receive article data from BlogAmplify. The endpoint should:
- Accept
POSTrequests with aContent-Type: application/jsonbody - Return a
2xxstatus code on success - Be publicly accessible from the internet
Understand the payload format
BlogAmplify sends the following JSON payload to your endpoint when an article is published. The event field is "post.published" for real articles and "post.test" for test pings.
{
  "event": "post.published",
  "timestamp": "2026-03-13T10:30:00.000Z",
  "data": {
    "id": "post-uuid-here",
    "title": "Your Article Title",
    "slug": "your-article-title",
    "content_html": "<h2>Introduction</h2><p>...</p>",
    "content_markdown": "## Introduction\n\n...",
    "meta_description": "SEO meta description here",
    "featured_image": {
      "url": "https://s3.../featured-image.webp",
      "alt_text": "Description of the image"
    },
    "schema_markup": {
      "@context": "https://schema.org",
      "@type": "BlogPosting",
      "..."
    },
    "primary_keyword": "main keyword",
    "secondary_keywords": ["keyword1", "keyword2"],
    "word_count": 1500
  }
}
content_html contains the full article with semantic HTML. content_markdown has the same content in Markdown (may be null). Use whichever format your CMS prefers.
Set up webhook signature verification (recommended)
For security, BlogAmplify signs each request with HMAC-SHA256 using a shared secret. The signature is sent in the X-Webhook-Signature header as a hex-encoded digest.
Verify it on your server to ensure requests are genuinely from BlogAmplify:
const crypto = require('crypto');

function verifyWebhook(req, secret) {
  const signature = req.headers['x-webhook-signature'];
  if (!signature || !secret) return false;

  const expected = crypto
    .createHmac('sha256', secret)
    .update(JSON.stringify(req.body))
    .digest('hex');

  return crypto.timingSafeEqual(
    Buffer.from(signature),
    Buffer.from(expected)
  );
}

class="cb-cmt">// Express / Fastify example
app.post('/api/blog', (req, res) => {
  if (!verifyWebhook(req, process.env.WEBHOOK_SECRET)) {
    return res.status(401).json({ error: 'Invalid signature' });
  }

  const { event, data } = req.body;

  if (event === 'post.published') {
    class="cb-cmt">// Save the article to your CMS / database
    console.log('New article:', data.title);
    console.log('HTML content:', data.content_html);
    console.log('Keyword:', data.primary_keyword);
  }

  res.status(200).json({ success: true });
});Log in to BlogAmplify and select Webhook
Sign in to your BlogAmplify account and navigate to the integration page. Click the Custom Webhook card.
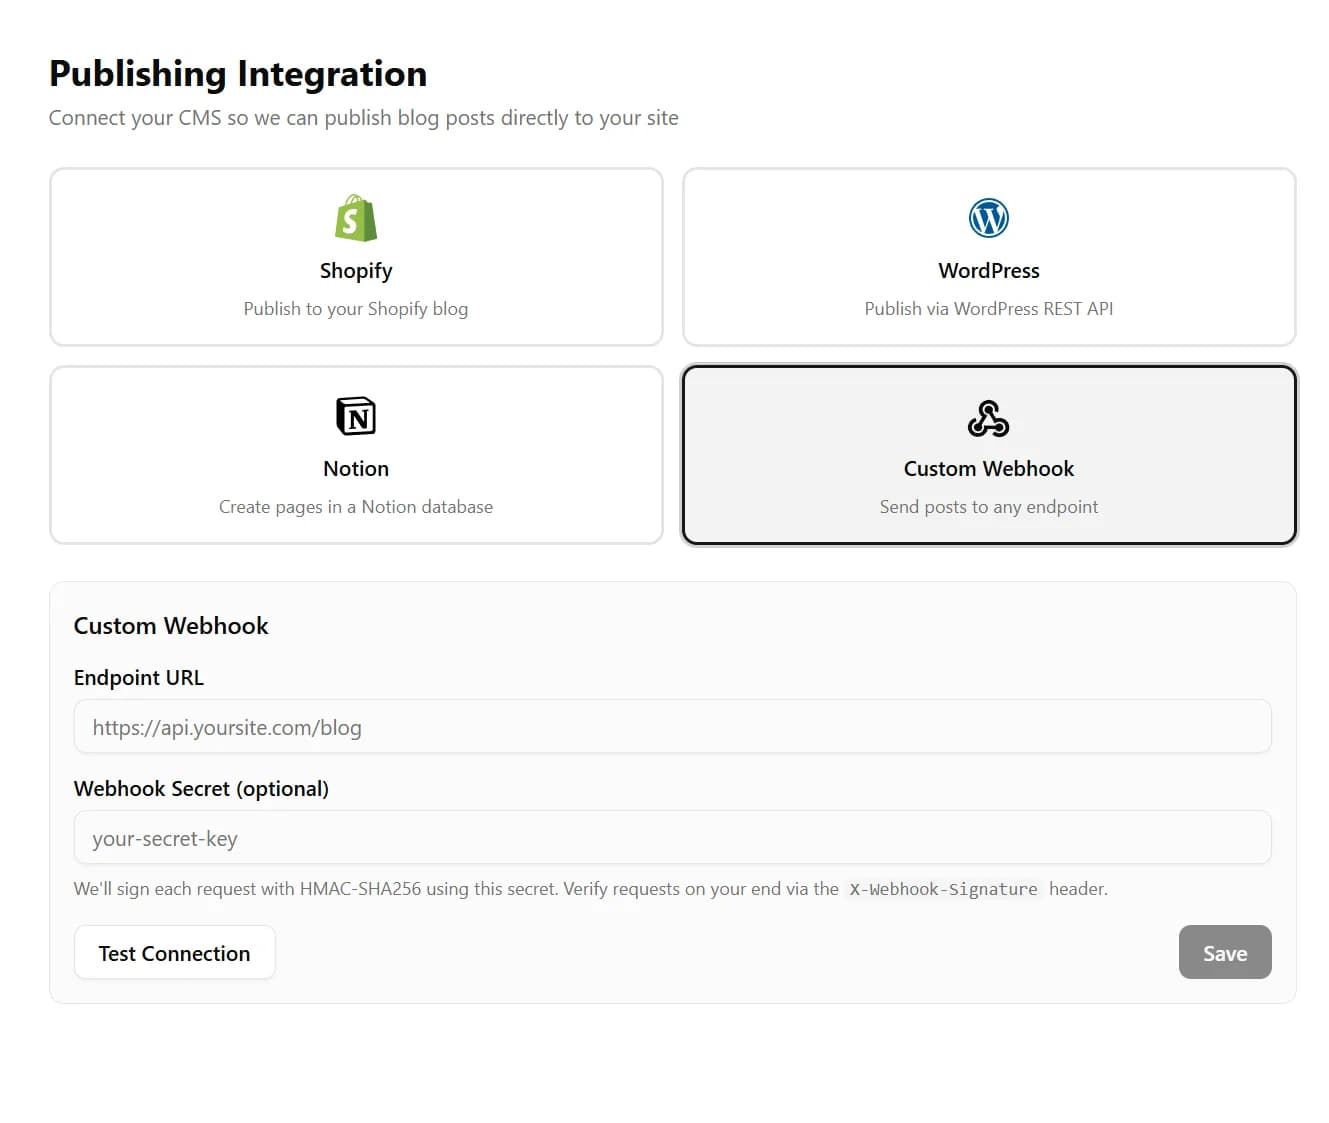
Enter your endpoint URL and secret
Fill in the fields:
- Endpoint URL — The full URL of your POST endpoint (e.g.
https://api.yoursite.com/blog) - Webhook Secret (optional) — A shared secret string used for HMAC-SHA256 signing. Generate a random string (e.g.
openssl rand -hex 32) and use the same value on your server for verification.
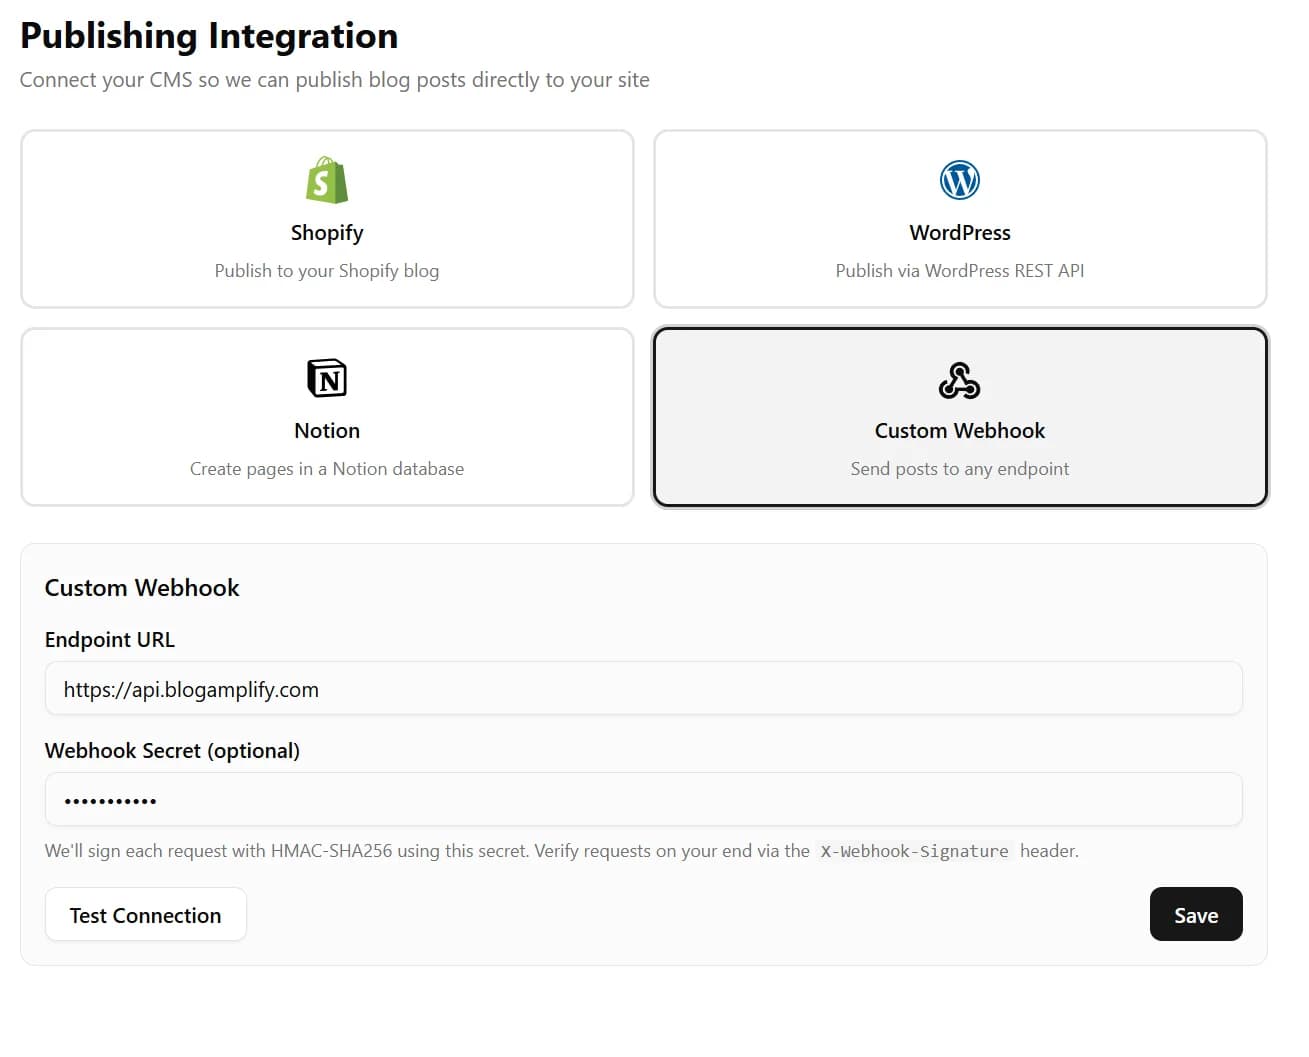
Test the connection
Click "Test Connection". BlogAmplify will send a test POST request to your endpoint with the same payload structure as a real publish, but with event: "post.test" and sample data. You'll see:
- Green checkmark if your endpoint returned a 2xx status
- Warning if the endpoint returned an error or was unreachable
Your endpoint should handle both post.published and post.test events gracefully.
Complete setup
Click "Complete Setup" to finish. Whenever BlogAmplify publishes an article, it will send the full article data to your endpoint as a JSON payload. You can process it however you like — insert into a CMS, send to a static site generator, store in a database, or forward to another service.
Troubleshooting
Test connection returns a network error
Make sure your endpoint is:
- Publicly accessible (not behind a VPN, firewall, or localhost)
- Using HTTPS (recommended) or HTTP
- Not blocked by CORS (CORS headers aren't needed since the request comes from our server, not a browser)
- Responding within 30 seconds (our timeout limit)
Signature verification fails on your server
Common causes:
- The secret on your server doesn't match the one entered in BlogAmplify
- You're verifying the parsed JSON object instead of the raw request body string. The signature is computed over the raw JSON string, not a re-serialized version.
- Your framework is modifying the request body before you verify it. Make sure to verify against the raw body.
Webhook fires but content is empty or missing fields
Check that you're parsing the request body as JSON. The Content-Type header is application/json. All article fields are nested under the data key in the payload. Fields like content_markdown and featured_image may be null if not generated.
Webhook works in test but fails during actual publishing
The test request uses the same payload structure as a real publish but with smaller sample data. Actual publishes include the full article content which can be much larger (10-50KB). Ensure your server's request body size limit can handle this. In Node.js/Express, increase the limit: app.use(express.json({ limit: '1mb' }))
Want to receive webhooks for other events (drafts, updates, deletes)
Currently, BlogAmplify sends post.published and post.test events. Support for additional events (draft saved, post updated, post deleted) is planned for a future release. Design your endpoint to check the event field so it's forward-compatible.